Advanced editing
Most functionality can be obtained by using the correct content type and editing with CKEditor, Drupal's default editor. Some can be obtained only by editing the HTML.
Embedding video
Many content types have a field for embedding video, however this method has limitations:
- There can be only one headline and caption no matter how many videos are embedded.
- Only YouTube videos may be embedded.
- Videos cannot be moved — their position is fixed.
- Videos always fill the available width (100%).
To achieve more control over video placement, edit the HTML by selecting the "Source" icon (<>) at the far right of the editing tools.
Embedding responsive videos manually
Step 1
Obtain the URL of the video to be embedded. It is not necessary to use the "share" option; simply copy the URL from your browser.
Step 2
Open a new browser tab and go to embedresponsively.com.
Step 3
Select the correct video source, usually YouTube or Vimeo.
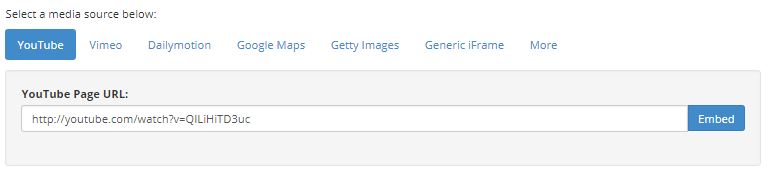
The URL field will already be populated with an example. Copy and paste the desired URL into the window and click "Embed." (Do not hit "Enter." This will result in the default URL reappearing.) The video will load and the responsive code will appear in the window below.
Step 4 (YouTube only; for Vimeo go to Step 5)
Edit the responsive code to remove related videos. Locate the video URL in the code and position your cursor after the last character, but before the closing quotation mark.

Enter the following code: ?rel=0. (Do not include the period after the zero.)
![]()
Step 5 (Vimeo and YouTube)
Copy all the code in the embed code window. You should have already clicked "<> Source" to view the code. If not, do so now. Place your cursor in the HTML where you want the video to appear, and paste the embed code. Click on the "Source" button again to view the placement of the video. You may now add individual headlines and captions for the each video. The videos may be moved anywhere on the page simply by cutting and pasting the code.
Note: Only the video owner can disable recommended videos on Vimeo.
Resizing video
In order to make videos responsive and appropriately sized for all devices, width and height should not be fixed at a specific pixel size, however, sometimes the full-size video can seem overwhelming on the page.

There are other options for presenting video on a webpage.
Using a DIV
Wrapping a video in a DIV allows for styling the video while maintaining responsiveness. In this example, 10% padding has been added to the left and right margins.
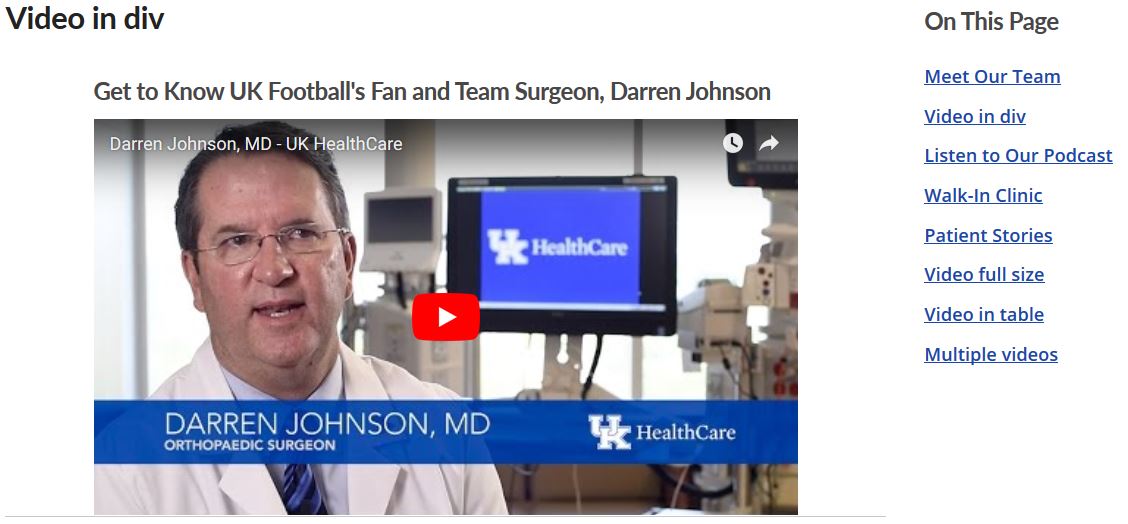
Because percentages have been used, rather than pixels, this video will resize correctly for a mobile device.

To use this method, wrap the responsive embed code in the following DIV code:
<div style="padding-left: 10%; padding-right: 10%">
Heading and embed code go here.
</div>
The heading code may be placed inside or outside the DIV code depending on the desired result. In the example above, the heading is inside the DIV. Placement of the heading or caption inside the DIV must be done by editing the HTML.
Using a grid
A div may also be used to display multiple videos in a row. If the page has no CTAs or a menu in the right rail, videos may be displayed three-across. Otherwise, no more than two videos should be placed side-by-side.

This DIV uses classes. In this example, there are two videos side-by-side, so the opening code for the each video is:
<div class="l-2up">
If three videos in a row are desired, the code would be changed to 1-3up, etc.
As in the previous example, this method is also responsive. When viewed on a phone, the videos will be stacked.

To use this method, wrap the responsive embed code in the following DIV code:
<div class="l-2up">
First headline and embed code go here.
</div>
<div class="l-2up">
Second headline and embed code go here.
</div>
Unlike the first method, this layout cannot be previewed by clicking the "Source" button again. The videos will appear to be stacked, however, upon publication, they will be side-by-side.
Headline styling
With this method, the headlines (if any) should go inside the individual DIVs. To add another row, repeat the code with the new videos and headlines. Add as many as needed. When styling headlines, be mindful of how small the videos are. Headlines should probably be H3 or smaller.
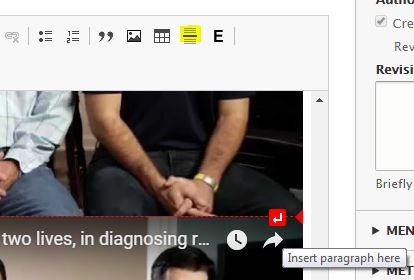
Adding a horizontal rule
If you are not using headlines, you may wish to place a horizontal rule (line) after each set of videos, which will appear between the rows. Otherwise, the videos will be too close together.

The HTML for a horizontal line is <hr />. You may also add it using the CKEditor. Hover over the bottom of the last video in the row until you see red line ending in an arrow, and the words "Insert paragraph here." Click on the arrow to add a space, then click on the horizontal line icon (next to the E).
Do not use tables
Do not use a table to place videos in a grid. Although this appears to work on desktop, tables are not responsive and will not present the videos correctly on small mobile devices.
Creating inline links
Creating inline links in Drupal is largely the same as most other editors, whether editing documents or web pages. If you are linking to a web page, select the text you would like to link, click on the link icon, and type in the URL. But what if you want to link to a file, such as a PDF or jpeg? The Entity Browser (File Browser) will allow you to select a file and create a link to it on the page, but that link will appear below the paragraph you are editing. There is a workaround for this. If you are not comfortable editing HTML, please ask for assistance from the webteam.
PDFs
Determine if the desired file has already been uploaded. You may search uploaded files, here. If not found, upload the new file, here, then return to the list of uploaded files. Click your cursor at the end of the file name and drag it to the left. Copy the file name. (If preferred, simply make note of the file name.) Return to the page you are editing. Select the text you wish to link and click on the link button. Paste the file name in the link box. Insert this text before the file name: /sites/default/files/. Click "Save."
Images